Trading Hub 4.0 (Part 6): Advanced Entries Across Multiple Timeframes
In this article, we will learn how to enter with the advanced EMA at the LTF and HTF.
We already know that the entry conditions according to Hub 4.0 are an EMA rejection, a flag appearing, and a strong bullish candle. However, this entry is only considered a Decisional entry with a 50/50 probability.
For the entry to have a higher probability, we need additional EMA liquidity.
EMA liquidity
Smart money notices that retail traders tend to trade every time price rejects the EMA, with a stop loss above/below the EMA candle. Therefore smart money will sweep the liquidity of these orders by pushing price to sweep through the EMA candle to hunt the stop of this candle; after taking enough liquidity, price can then continue in the previous trend.
In Hub 4.0, the act of taking EMA liquidity, or an EMA stop hunt, is the act in which smart money sweeps the liquidity of the strong bullish/bearish candle after it rejects the EMA.
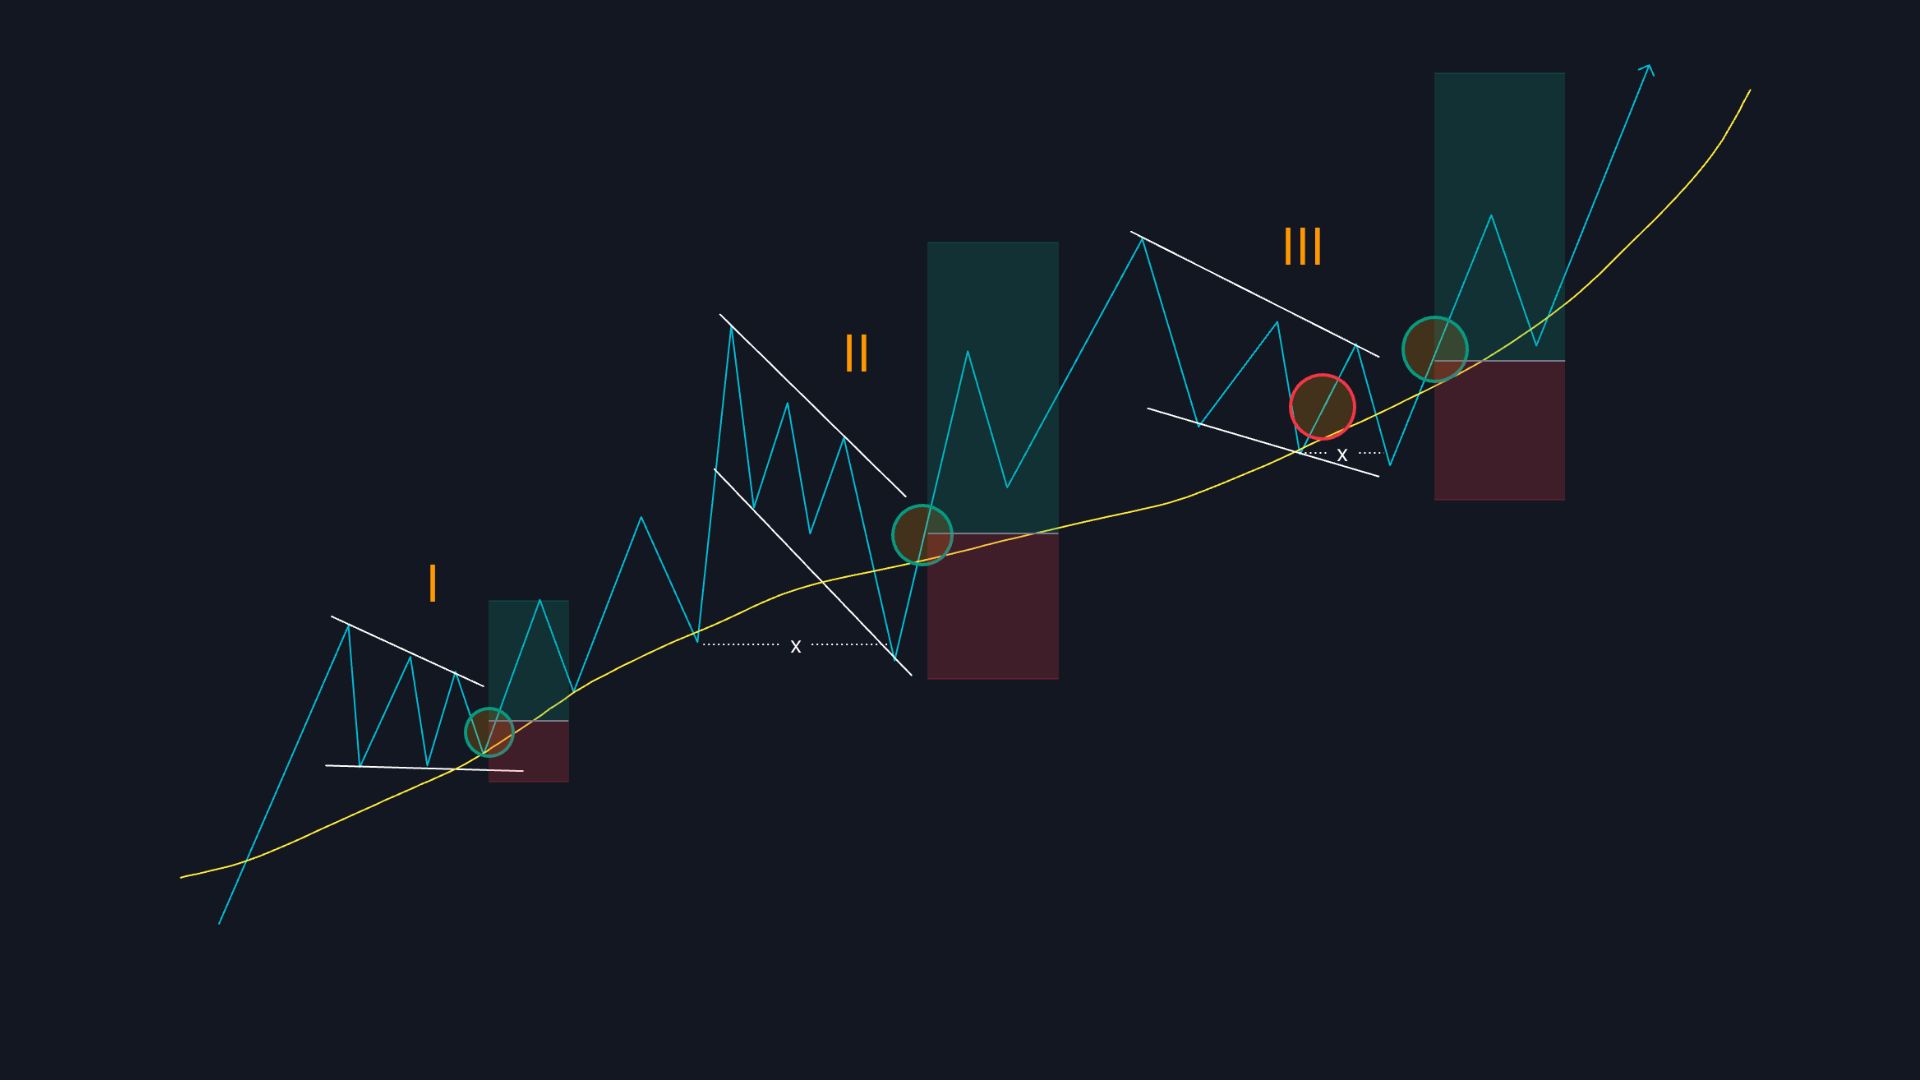 EMA liquidity
Observe the chart above:
- At flag No. I, the condition that price rejects the EMA and there is a bullish candle in the green circled area is satisfied, so we can enter a buy order. However, this entry is only a Decisional entry with a 50/50 probability because the EMA has not yet been swept.
- At flag No. II, price breaks the EMA and sweeps the EMA liquidity of a candle in the past, then rejects the EMA and a bullish candle appears in the circled area; we can enter a high-probability buy order here.
- At flag No. III, price breaks the EMA and sweeps the EMA liquidity of the previous move, then rejects it and moves up, and a bullish candle appears in the green circled area; we can enter a high-probability buy order here.
Note: do not confuse sweeping EMA liquidity with IDM; these are 2 different concepts. Remove Hub 3.0 from your head when learning Hub 4.0.
It can be seen that at flag No. III, if we buy right away in the red circled area after the EMA rejection without a liquidity sweep, we will be stop-hunted on the next move. Waiting for the EMA liquidity sweep will help us get a high-probability entry.
Entries across multiple timeframes
| HTF | LTF |
|---|---|
| H1 | m10 |
| M15 | m2 |
| M5 | m1 |
| Multi timeframe table |
At the HTF we enter when EMA liquidity is swept.
To improve RR and reduce risk, move down to the LTF and enter when the conditions are satisfied: Flag + EMA rejection + a strong bullish/bearish candle appearing.
-> When the market has swept EMA liquidity at the HTF, we can enter right away at the LTF without needing to sweep EMA liquidity anymore.
In summary, we have the following entry cases:
- HTF does not sweep the EMA -> consider whether to enter at the HTF or not, because the probability is only 50/50.
- HTF does not sweep the EMA -> move down to the LTF -> if it sweeps the EMA, enter with a 1:2 ratio.
- HTF sweeps the EMA -> enter a high-probability entry at a 1:2 ratio.
- HTF sweeps the EMA -> move down to the LTF to enter (at the LTF there is no need to sweep the EMA anymore) and place TP at the same level as the TP at the HTF.
A real high-probability entry
The image below shows 2 high-probability trades at HTF M15 with an EMA liquidity sweep (the letter -x-). We can enter right away at a 2R ratio and place the stop loss above the flag.
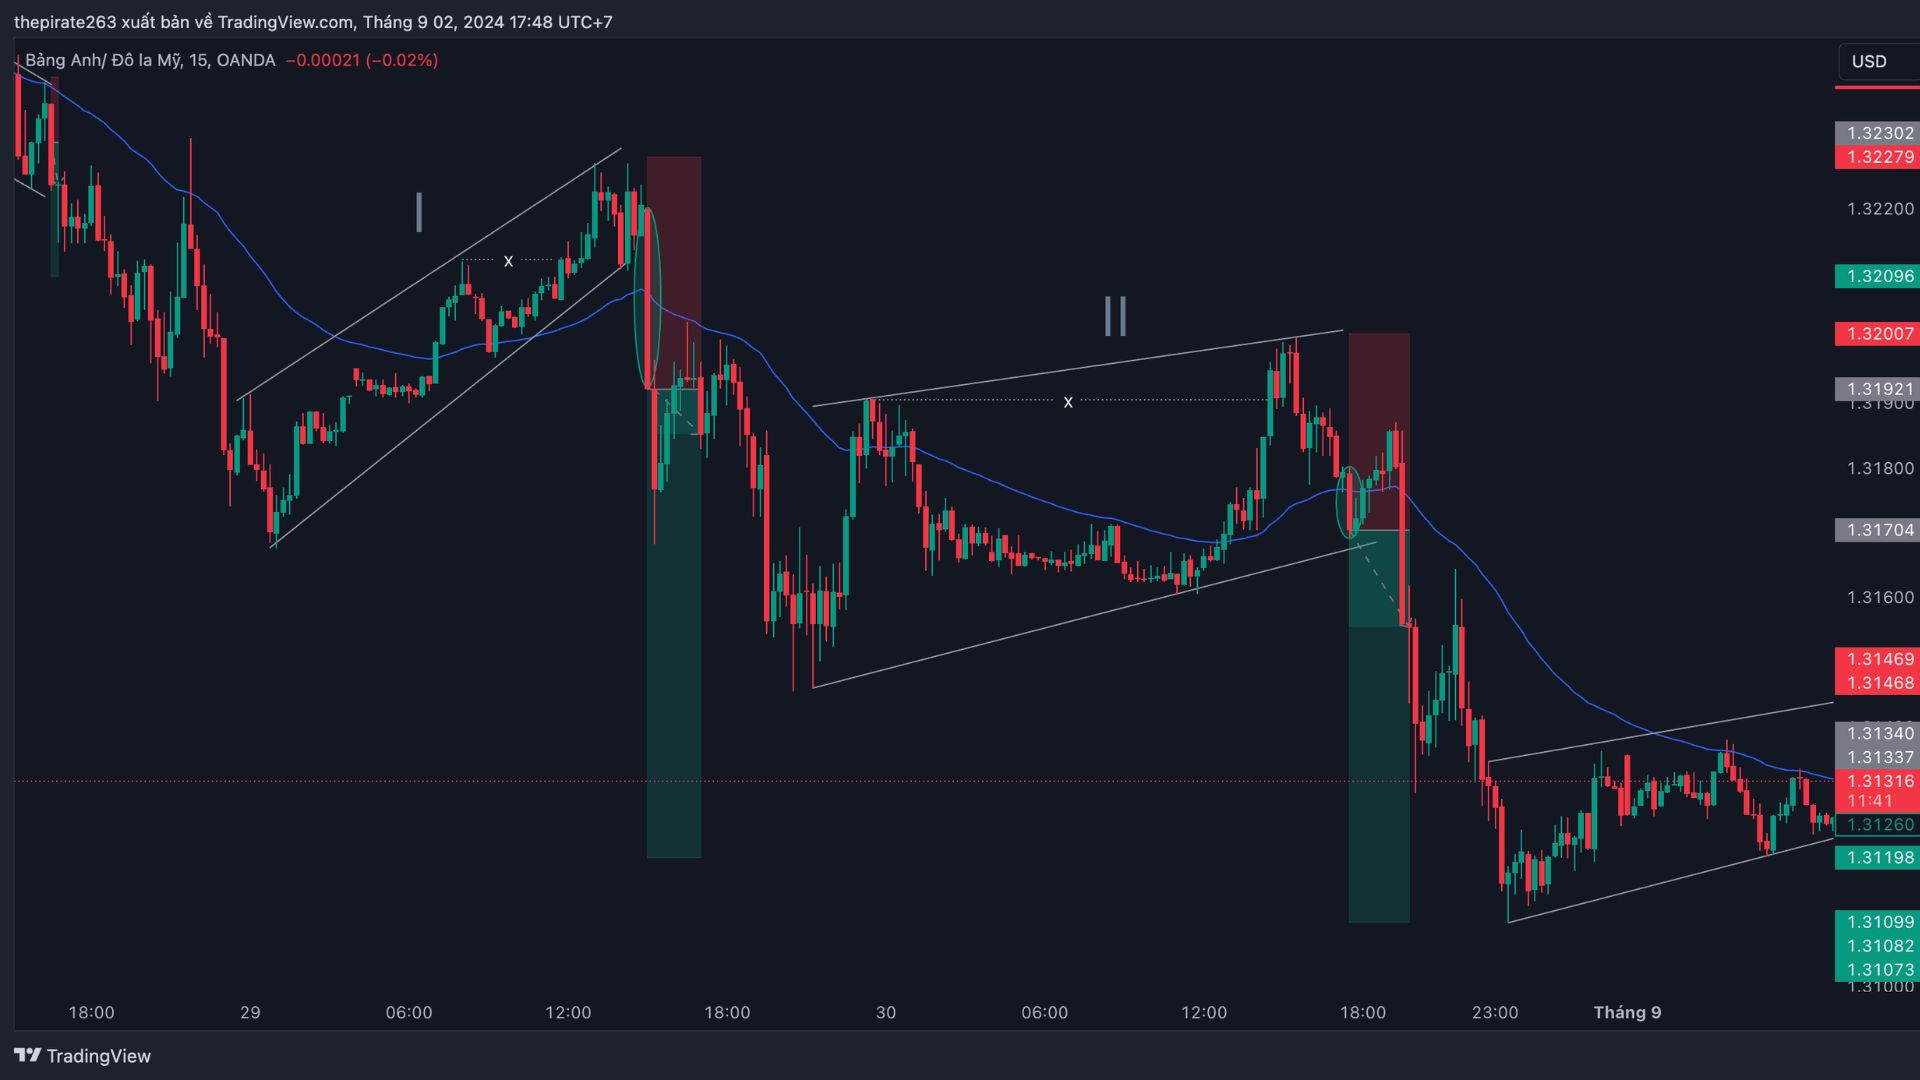 A high-probability entry after sweeping EMA liquidity
Bringing flag No. I down to the LTF, we can enter 2 more trades as in the image below; keeping TP the same and reducing SL, we will have a much higher RR ratio.
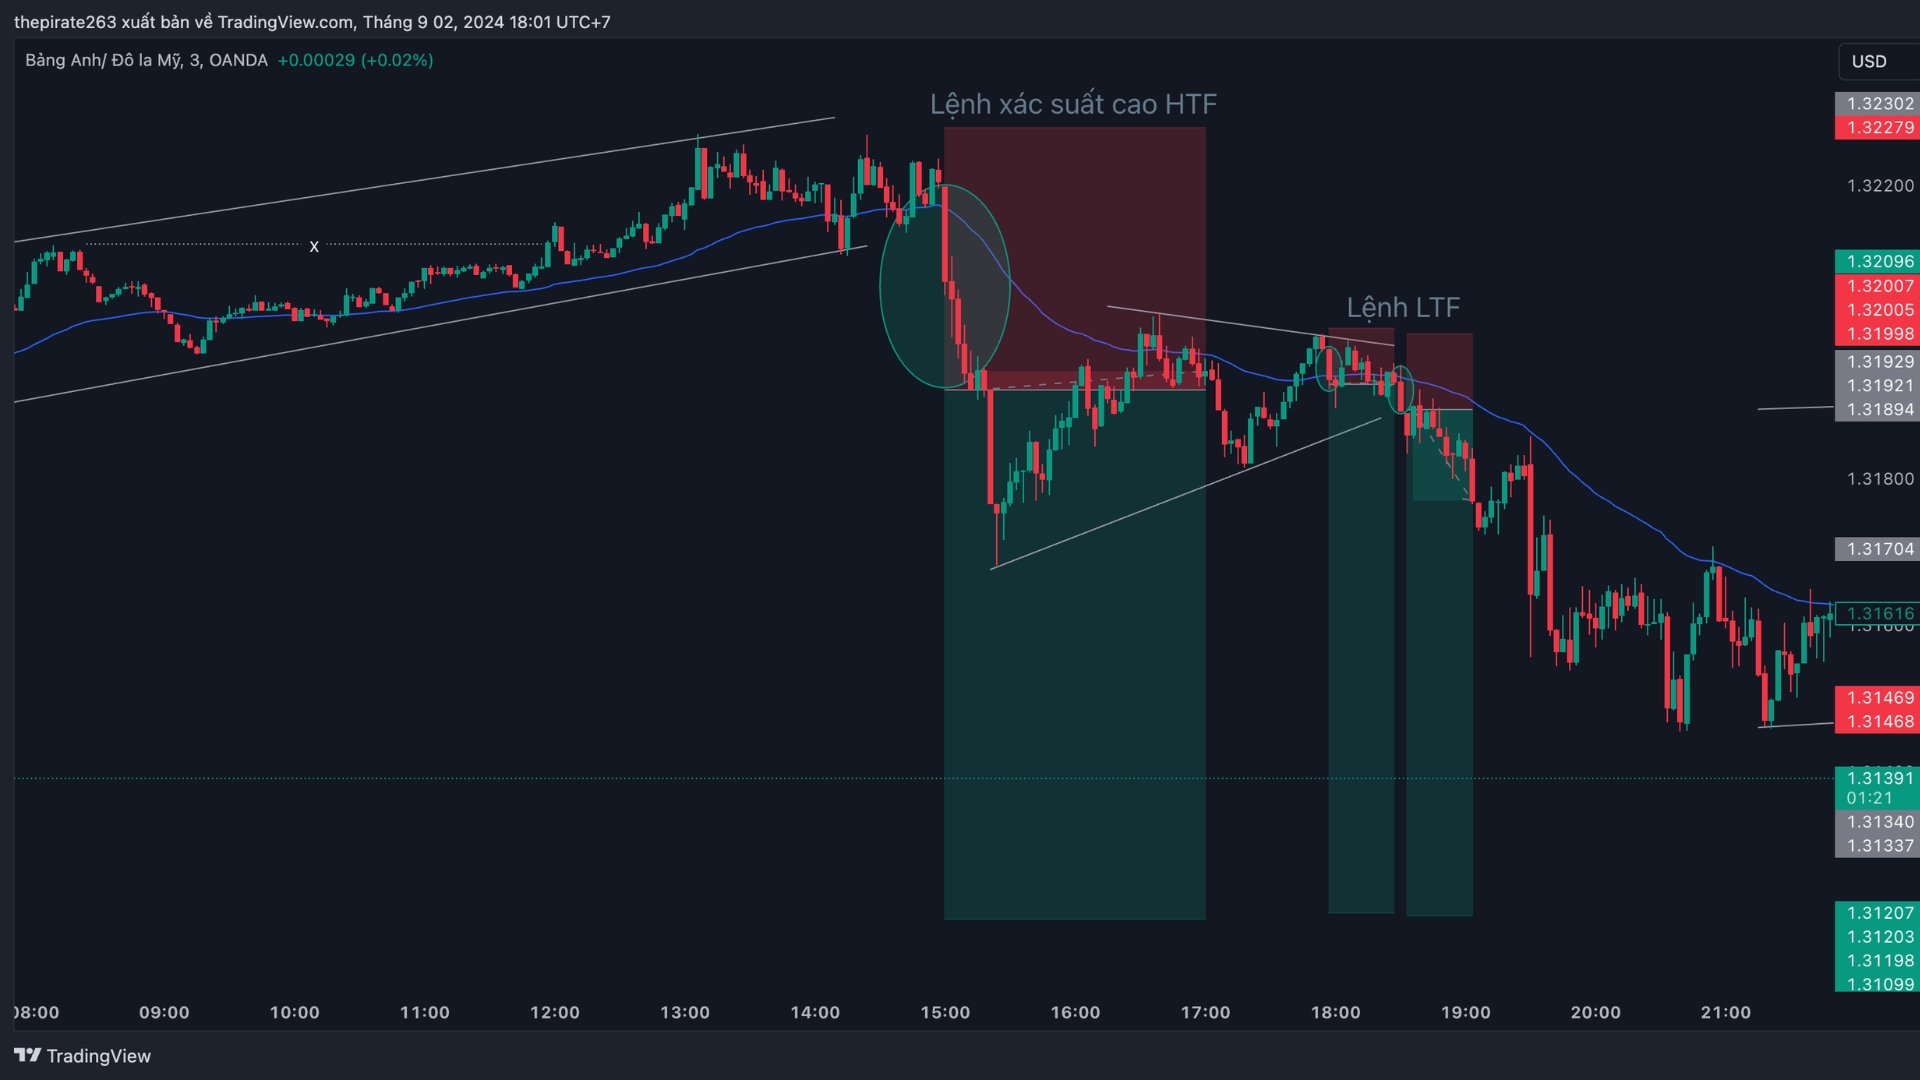 Entering at a lower timeframe to reduce risk and increase reward
Similarly, bringing flag No. II down to the LTF, we can enter a trade as in the image below with a much higher R:R ratio.
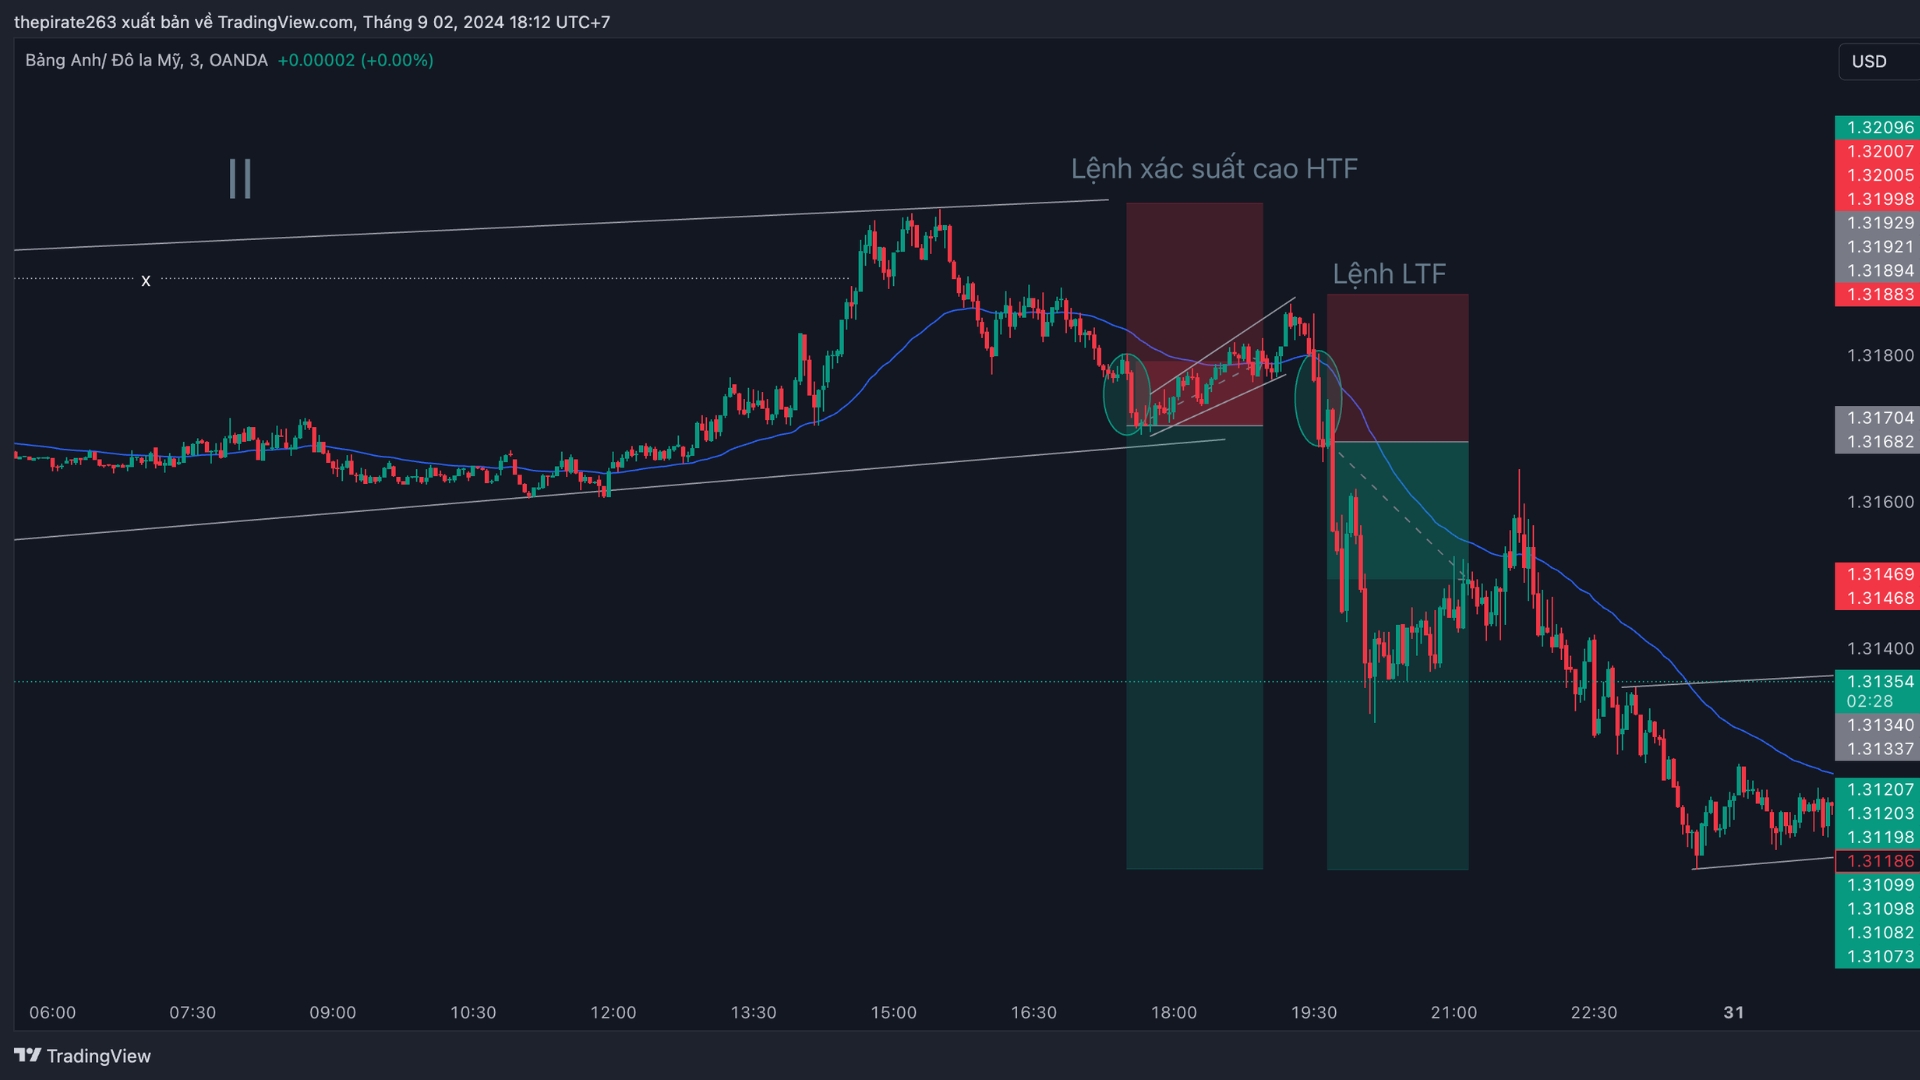 Entering at the LTF to increase the RR ratio
Returning to flag No. I, if we enter as in the image below when price has not yet hunted the EMA, we will hit SL.
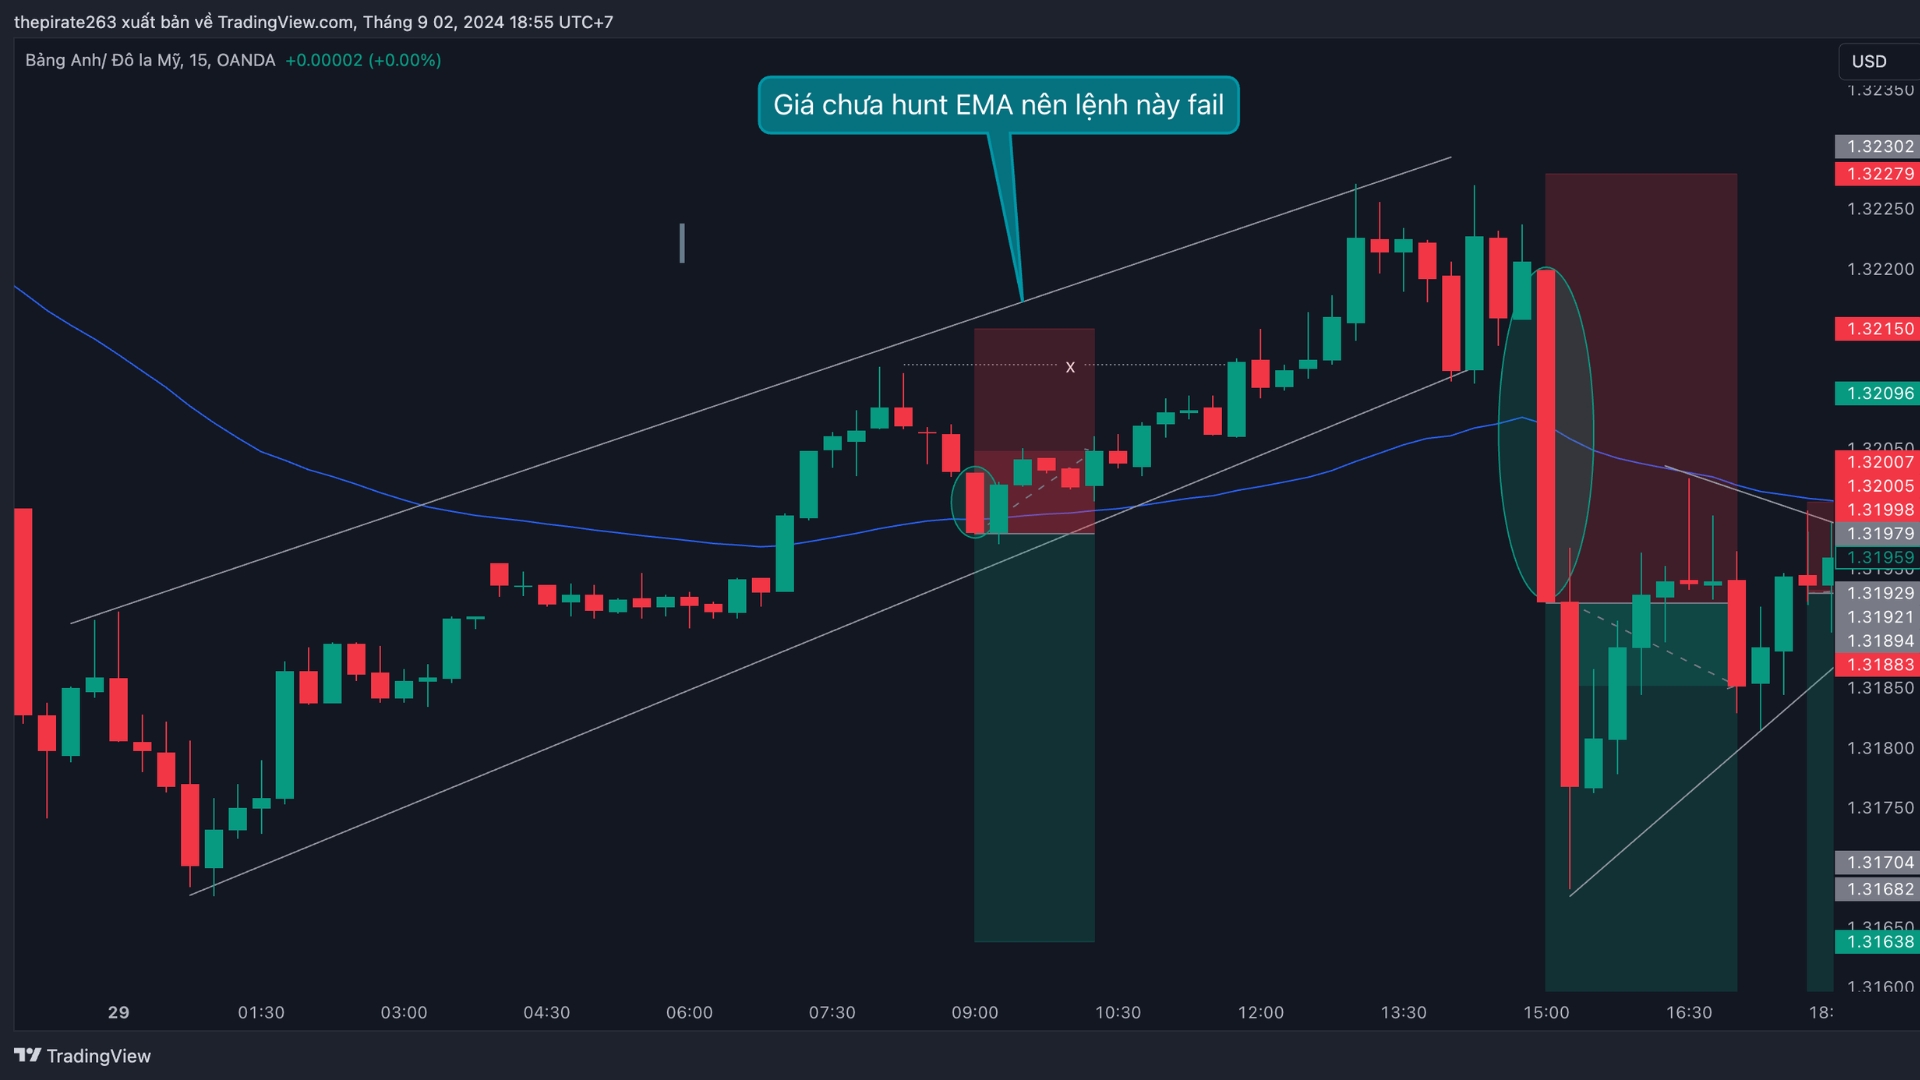 Entering when price has not yet swept the EMA leads to failure
Video updating…
5/5 - (1 vote)
Read structure 10x faster with JUKA
JUKA maps SMC structure — swings, BOS, CHoCH and inducement zones — automatically on any TradingView chart. No more hand-drawing structure for hours.
Get JUKA — $150