SMC Full Entry Model: From Bias to Stop Loss, Step by Step
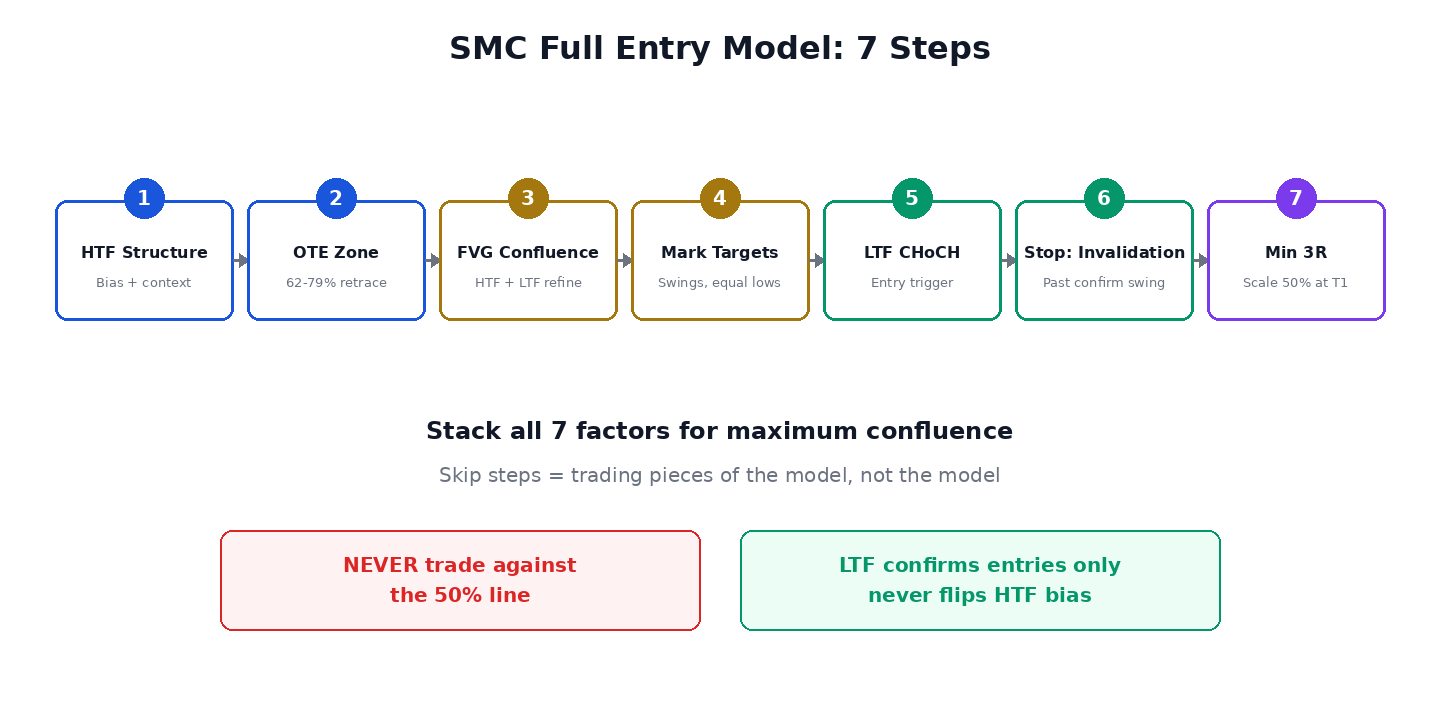
Knowing BOS from CHoCH and reading top-down will keep you on the right side of the market — but neither tells you exactly where to enter, where to put your stop, or where to take profit. That's the job of an entry model. This guide lays out a complete, mechanical SMC entry model: structure for bias, OTE for the zone, FVGs for confluence, a lower-timeframe CHoCH for the trigger, invalidation-based stops, and a minimum 3R rule for targets.
Step 1: Start with HTF market structure and context
Every entry model starts with structure — everything flows from it. On the higher timeframe (the 1H in this model), read the trend using external structure only: BOS needs an hourly close beyond the level, wicks don't count, and an external low is strongest when price first swept the lows beneath it before extending.
Just as important: read the larger context. An early uptrend forming inside a bigger downtrend might be nothing more than relief before another lower high. Your HTF read gives you bias; the larger context tells you how much to trust it.
Step 2: Mark the OTE zone (62%–79%)
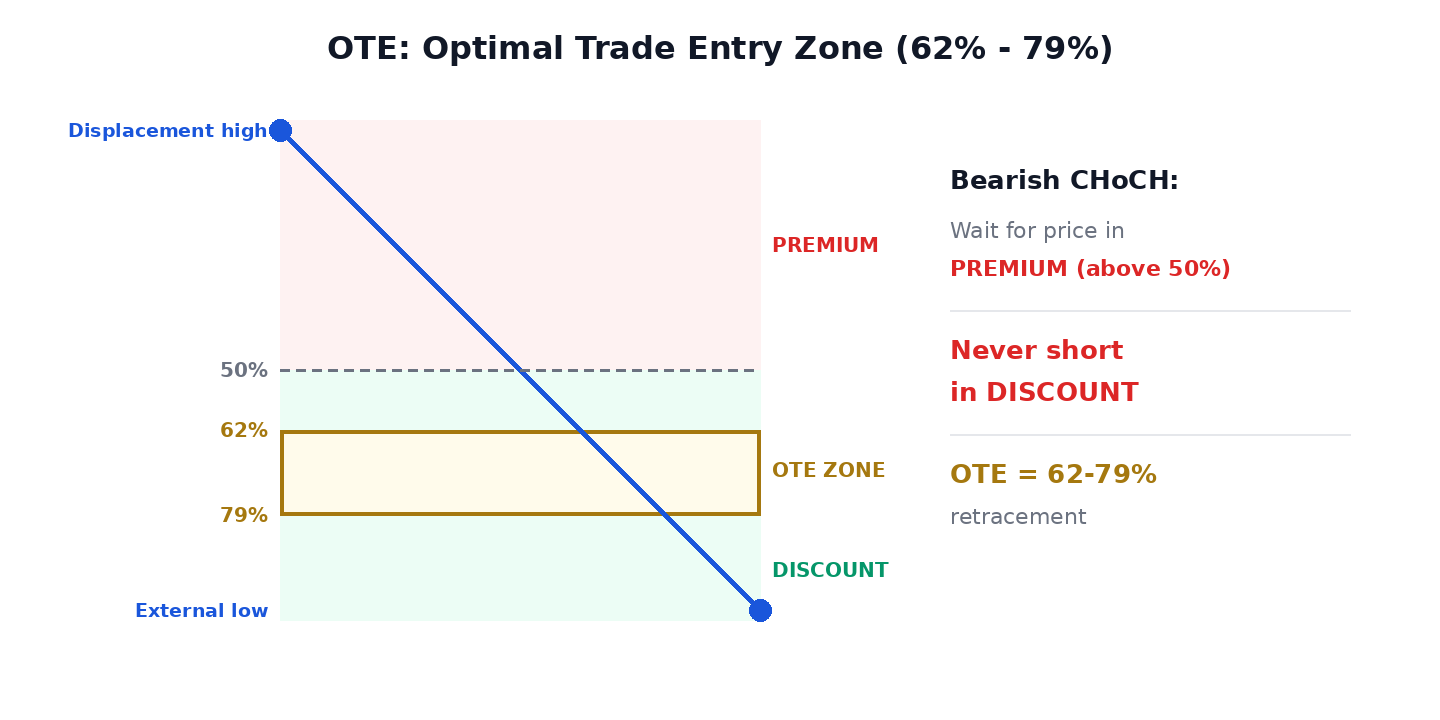
Draw Fibonacci from the high where the displacement began (the move that produced the CHoCH) to the new external low. The 50% line splits premium (above) from discount (below). The OTE — Optimal Trade Entry — zone is the 62%–79% retracement of that measured move.
After a confirmed BOS or CHoCH, price very often snaps back into this zone before continuing. The mechanical patience rule: with a bearish CHoCH, you cannot short anything below the 50% line — that's discount, and shorting discount is how traders get stopped out. You wait for price to come up into premium. This single rule kills FOMO: most traders short the fresh lows right after the break, but the majority of the time price first pulls back to rebalance the imbalance left by the displacement move.
Step 3: Layer FVGs for confluence
Mark the higher-timeframe fair value gap off the extreme — then don't stop there. Drop to a lower timeframe and refine: a 15-minute FVG off the same area further defines the zone of interest. When the HTF FVG sits inside the OTE zone and a LTF FVG narrows it further, you have genuine confluence on location.
Critical distinction: FVGs outline where to look — they are not entries by themselves. Entering blindly at an FVG without confirmation is just another way to chase. The zone is the hunting ground; the trigger comes next.
Step 4: Pre-mark your targets
Draw targets before any entry exists. Two kinds:
- Target 1: an obvious tested swing level below (for shorts) — the first place price is likely to react.
- Target 2 (final): resting liquidity — for example, equal lows price came within a pip of but never took out. Untouched equal lows mean liquidity is still building beneath them, and since markets seek liquidity, those levels are likely to get raided. In a bearish context, they make a natural final target.
No entry yet, no trade yet — but you already know exactly where the trade would go if it sets up.
Step 5: The trigger — LTF CHoCH confirmation
When price rallies into your OTE zone, that's enough to start hunting — you don't need it to tag an exact level. Drop to the 5-minute and wait for it to confirm: the 5M will be in its own small trend, and you need a 5-minute CHoCH — a close beyond its external low — flipping it toward your HTF bias.
A stronger variant: a lower high forms before the CHoCH ("CHoCH plus"). It's uncommon and worth noting when you see it — the market showed weakness before the break.
Then the practical question: enter on the confirmation candle, or wait for a pullback for a tighter stop? The tiebreaker is simple — check for imbalances above. If there's no LTF imbalance for price to come back and tag, waiting risks missing the trade entirely. If there is one, waiting usually pays for itself with a better stop.
Step 6: Stop loss at invalidation — not at a random distance
The stop's job isn't just to take you out — it must sit where the trade idea is proven wrong. After a 5-min CHoCH confirmed by a lower high, the stop goes above that lower high: if price takes it out, bears have not retaken control and the thesis is dead.
Never place stops at fixed pip distances or "just beyond the zone." If you can't point to the exact level that invalidates your read, you don't have a trade — you have a guess with a stop attached.
Step 7: Demand minimum 3R and manage the trade
Measure risk (entry to stop) against reward (entry to final target). The rule: minimum 3R — reward at least three times risk. A setup measuring 2.8–2.9R is acceptable; 2.3–2.5R is not worth taking. This filter alone eliminates a huge number of mediocre trades.
Management is boring on purpose: take 50% off at T1, let the rest run to T2. While price chops between targets without taking out significant structure, there's nothing to do — managing means not interfering.
One apparent contradiction to clear up: you marked premium but you're entering in discount — is that wrong? No. The premium zone already served its purpose (rebalancing the displacement move). The LTF CHoCH confirms the small trend is rotating back in line with HTF bias. Zone purpose and entry location are two different things.
Why it works: stacking simple factors
The model is deliberately simple. The edge comes from stacking:
- HTF CHoCH aligned with the larger trend
- OTE zone (62–79%)
- FVG confluence (HTF + refined LTF)
- LTF CHoCH confirmation trigger
- Minimum 3R risk-reward
No single factor is magic. More factors in your favor means more confluence, which means a higher probability the trade reaches its target. Skip steps and you're not trading the model — you're trading pieces of it.
The checklist
- HTF structure + larger context sets bias. Everything flows from this.
- Draw Fib from displacement origin to the new extreme; OTE = 62–79%.
- Never trade against the 50% line: no shorts in discount after bearish CHoCH.
- Most breaks get retraced first — don't chase; wait for the zone.
- FVGs define the zone (HTF, refined on LTF) — they are not entries.
- Pre-mark targets: swing levels + untouched equal-lows liquidity.
- Trigger = LTF CHoCH in HTF direction (lower-high-first variant is stronger).
- Stop at invalidation, beyond the confirming swing.
- Require ≥3R; scale 50% at T1.
Stop Drawing Structure by Hand
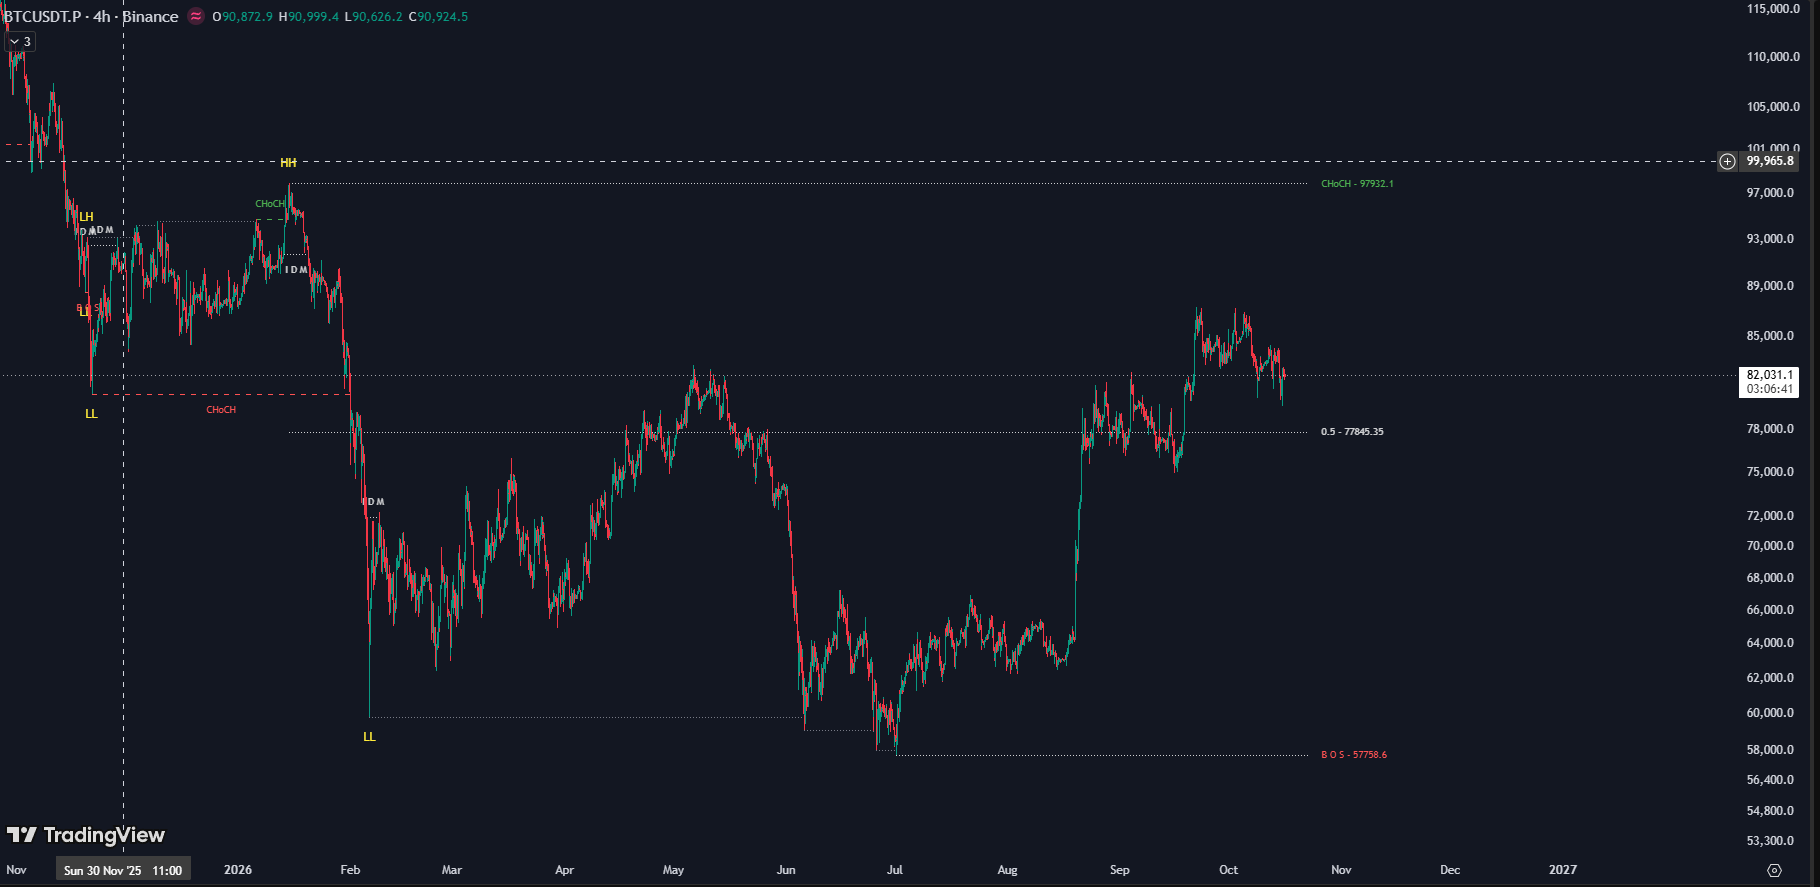
This is JUKA live on BTC 4H — every swing, BOS, CHoCH, IDM, and the premium/discount equilibrium labeled automatically, in real time.
No missed breaks. No mislabeled noise. No hours of hand-drawing. Full Pine Script v5 source code — yours to own forever, $150 one-time.
Get JUKA Source Code — $150